Story of a Flaw
Nexus 4 has an invisible design flaw: the back side of a phone is just glass, which, while looks pretty to some, makes it slide down and fall from pretty much any surface. Another unfortunate caveat is the curved unprotected glass on the front. If the phone falls down, it’ll most likely crack…
And here I present a 20 day old brand new Nexus 4:
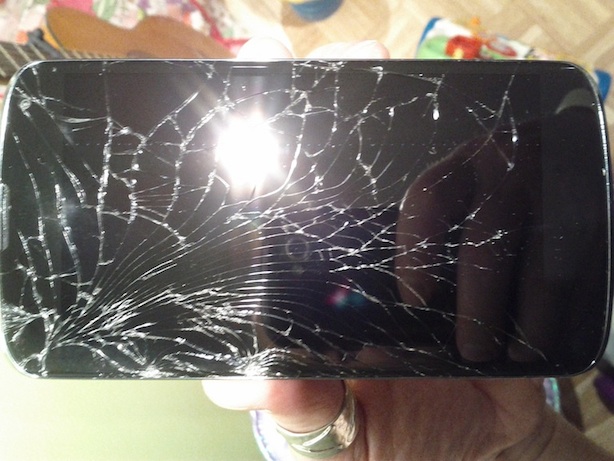
After the unfortunate flight down, the screen is done and stopped responding to any tapping/touching. In addition the screen is locked with a gesture pattern. The phone is not rooted and with a locked bootloader: exactly how it comes from Google.
Android iTunes
At this point I need to back it up and factory reset the phone in order to ship it safely for repairs. Since Google is moving towards Apple’s “lock down and control” system design, the phone can’t be just plugged in via USB to back up its files (e.g. via USB Mass Storage), now days there is MTP. As Google puts it:
“We did it because we wanted to be able to merge the “public shared storage” (i.e. for music and photos) with the internal private app storage.”
Yea, ok, while it does have a technical merit, it really brings user experience closer to the “iTunes level”, not as bad yet, but quite close. In any case, since the Nexus 4 screen is locked, Android iTunes complains that until that screen is unlocked it won’t be showing any files. Yea, thanks for the security Apple.. I mean Google.
Unlocking the Screen
There is a great tool written by Alexanre which allows to control an Android device remotely from Mac/PC. In other words a regular keyboard/mouse could be used to control the Android device. The tool is called Android Screencast. The only caveat, the phone needs to be rooted in order to be controlled by this tool. I got to see the phone’s screen on my Mac:
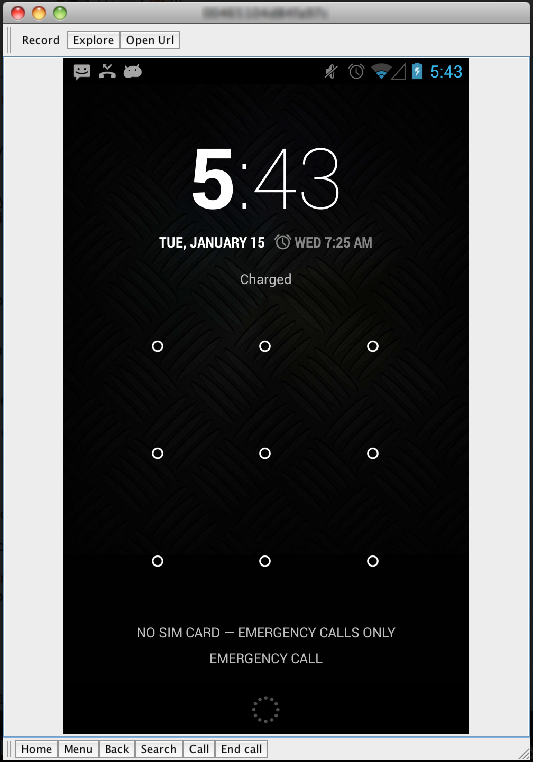
In order to make Mac keyboard to work I need to do “chmod 777 /data/dalvik-cache” as root (e.g. “su”), but the phone is not rooted, bummer. The tool is great though.
Btw, if the phone was rooted, I could simply do: “adb shell rm /data/system/gesture.key” to get rid of the screen lock.
Backing Up What’s Dear
One thing I knew I could do for sure is to backup the “sdcard”. I knew this because of two things: I have “USB Debugging” on, which means I can use adb, and “sdcard” is not owned by root, which means it can be “pulled”/”read” by adb. Hence the first step is clear:
./adb pull /sdcard/ /destination |
At this point all the pictures / videos / music, etc.. are backed up. Now I need to backup my SMS, contacts, etc.. Information that lives in Android “databases”. For example contacts usually live here “/data/data/com.android.providers.contacts/databases”. Which can’t be simply “pulled” as pitures, since they are protected, and hence cannot be read by adb directly.
Another tool to the rescue: Moborobo. The only caveat it is a Windows tool, and in order to install it I needed to power up my virtual box. The tool is pretty neat and quite powerful. Unfortunately all it could backup for me was SMS, everything else failed, but it is one step further nevertheless + I have most of my contacts gmail synced. Apps would be nice to backup, but they can be reinstalled manually later on.
Waving Goodbye or The Factory Reset
Now the interesting bit: the factory reset. It was not really straightforward, since most of googled instructions either talk about doing it from within a phone by tapping through settings, which is not an option in this case, or by using Home / Back buttons which are also a part of the screen that does not work. But after some minutes “the way” revealed itself.
Firstly the phone needs to be rebooted in “Recovery mode”, which can be done through fastboot, in case “USB Debugging” is not enabled:
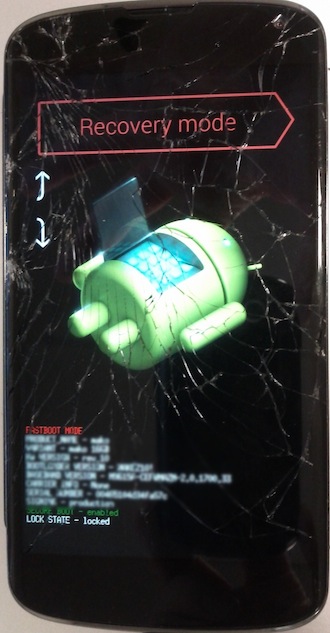
Disconnect the phone. Power it down (by holding the Power button). Reboot into fastboot mode by holding the Volume Down button and Power:

The “Recovery Mode” is two Volume button clicks away (confirm with a Power button once the mode is selected):
In case “USB Debugging” is enabled, the easier way to get to this step would be via adb:
./adb -d reboot recovery |
Which will boot into:
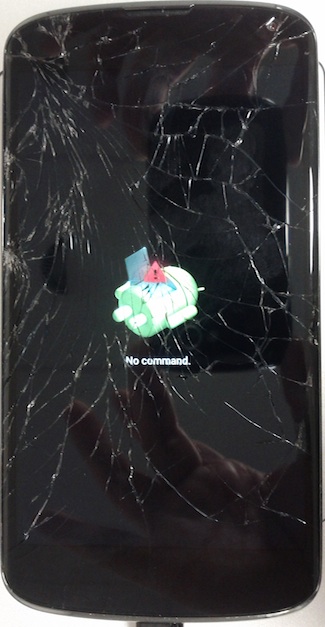
From here press and hold Power button and then press Volume Up, which will get into:
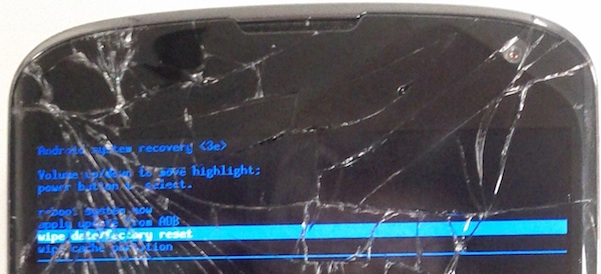
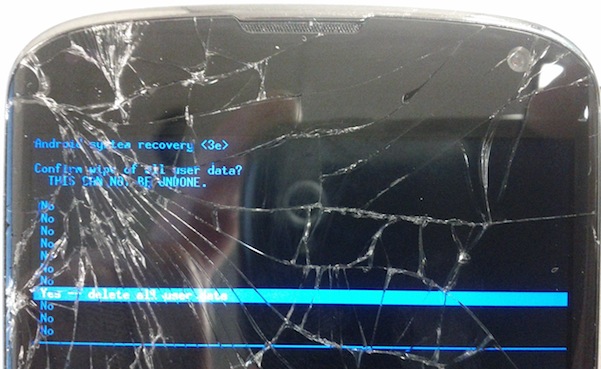
Now all that needs to be done is to mentally wave good bye to all the data and confirm the reset:
And the Award Goes To…
All the pictures are courtesy of my good old Nexus S, which has fell down countless number of times over the years and have a couple of scratches on the back. Yes, “they” knew how to build phones for real in the good old days..