"; */ ?>

eclipse


6
Apr 10

Spring Batch: Quick Start

Spring Source Logo

You heard about Spring Batch, but have this “uneasy” feeling about where/how/what you should start with? A year ago it was truly difficult for a non geek developer (most of the developers) to start with projects like Spring Batch, Spring Integration, Spring Webflow, Spring MVC, etc.. But now..

Now, you have no excuse: it is extremely simple to build a sample Spring project, of pretty much any “flavour”, that comes pre-built with unit and integration tests, that you can run right after those 12 seconds that you spent downloading the project, and resolving dependencies.

Does it sound helpful? Well, not really, since I just said what will happen, and how easy it is to make it happen, but there was no how part… I hate when people do that :)

So without further ado, here comes the “how” part:

Step 1. DON’T PANIC :)

After successful completion of Step 1, it is time for…

Step 2. Download Spring Tool Suite

As I already mentioned in “Spring Insight in Action – 5 Minutes From Scratch“, I like to think about Spring Tool Suite as Eclipse on Spring rocks (Spring IDE, Spring Interactive Tutorials, Exception Resolution, Grails support, Spring Insight, Spring tc Server, Spring Template Projects, and much more): http://www.springsource.com/products/springsource-tool-suite-download

Step 3. Create New Spring Template Project

After Spring Tool Suite is started (remember, it is just a Spring version of Eclipse, so it should look very familiar), press Ctrl+n to create “something” new, and start typing “spring temp…”:
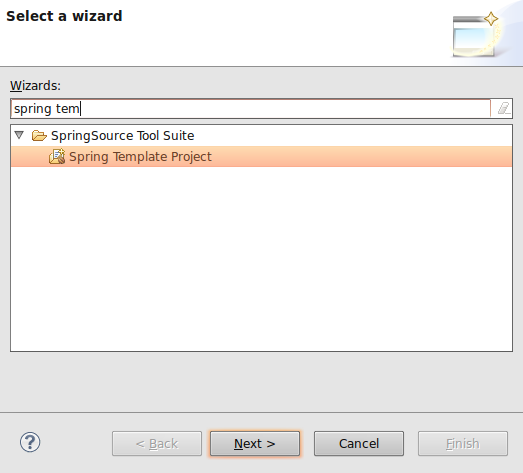
Spring Tool Suite: New Spring Template Project

As you type, Eclipse will narrow down selection to “Spring Template Project”. Select it, and click Next:
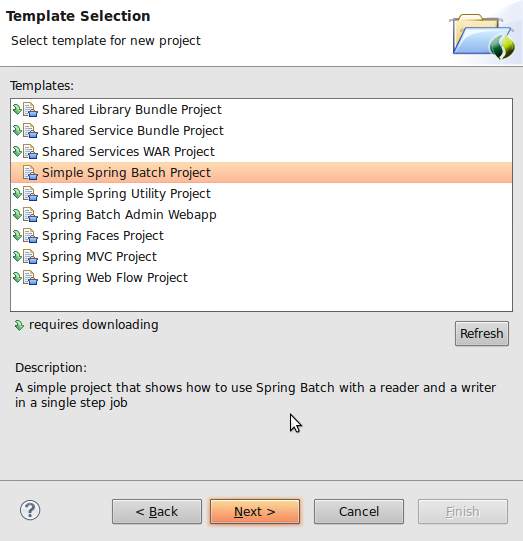
Spring Tool Suite: New Spring Batch Template Project

Here you can see many hot and ready to go Spring template projects that you can explore. The purpose of this article is to show how easy it is to start with Spring Batch, but for the most part, you can follow these steps to create all of the projects from the list above. (as an extra credit, try to create a Spring Integration Template project, once we done here).

Select “Simple Spring Batch Project”, and click Next:
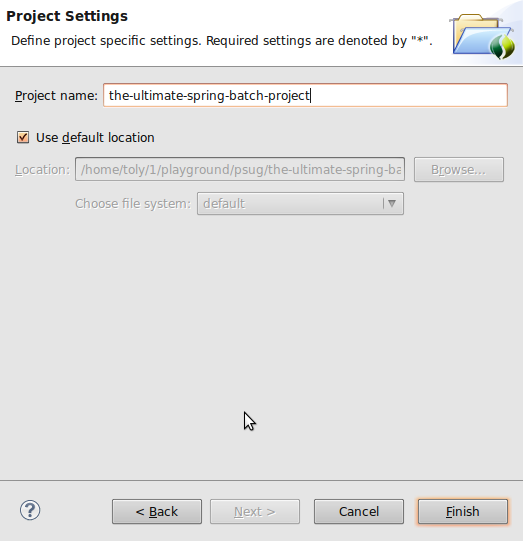
new spring batch template project name

Name your fresh and ready to go Spring Batch project, and click Finish, here is what your own Spring Batch project will look like:
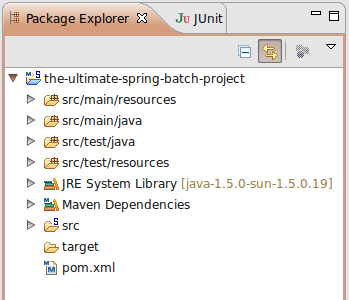
spring batch template project live

You are actually done right here, but, since curiosity is what makes us humans, let’s take a look at what’s inside:
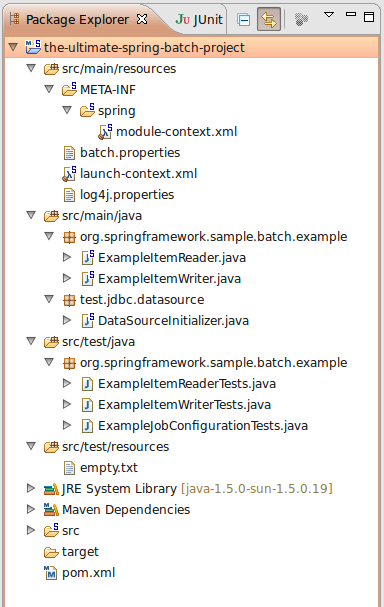
spring batch template project structure

As you can see, it is a Maven structured project with all the goodies: source, tests, pom, configs, etc..

Let’s look at your first real Batch Job. Double click on “module-context.xml”:

spring batch template project job config

In order to make sense of what you are looking at, you can refer to a very good and extensive Spring Batch documentation: http://static.springsource.org/spring-batch/reference/html/index.html

Step 4. Make Sure It Works

But hey, don’t just believe me that it works => make sure it does! And how would you do that? Well, again, simple: just run a test:

spring batch template project run test

Now you should see some green, which actually tells you: “it works indeed”.

Now you see, that starting to work on any major Spring Project is only a couple of mouse clicks away. You can really feel how close and accessible all that knowledge is. So be brave and take it all!

Good Luck!


7
Mar 10

Think About Code Quality

code-qualityRecently one of my friends from work asked me to help him improve the process around code quality and developer productivity. So I compiled my thoughts and e-mailed to him, but then I realized that it may be very helpful for others who are involved in software industry. Are you? Then keep reading.. :)
Although tools and frameworks listed here are JVM-based language focused, the approach can be definitely reused with any other environment / language / technology. So without further ado, here it goes:

The center of the code quality monitoring can be either Continuous Integration ( e.g. Cruise Control: http://cruisecontrol.sourceforge.net/ ) or Sonar ( http://sonar.codehaus.org/ ). Sometimes both.

Continuous Integration should be setup to “Intergarte Continuously” :) which means every time something is checked in, force a build. That is the whole purpose of “Continuous Integration”, and that is why I am really against the way Cruise Control is used on some client sites [builds on demand by pressing a build button.. grrr, back to 1990-ties].

So given that “Continuous Integration” is not misused, it will be plugged in with PMD ( http://pmd.sourceforge.net/ ) / Findbugs ( http://findbugs.sourceforge.net/ ), Checkstyle ( http://checkstyle.sourceforge.net/ ) and Test Coverage ( e.g. Cobertura: http://cobertura.sourceforge.net/ ) tools that will generate reports, and reflect the only true state of the code that is checked into the repository.

Now, as to a developer corner..

RAD is nothing more than just an Eclipse with lots of bloated (mostly unused IBM plugins). But being Eclipse it is very pluginable by nature. This means that PMD / Checkstyle / Cobertura reports can be available to developers prior checking in the code. PMD / Checkstyle at compile time, Cobertura at (test) run time. If possible, try to use something like Spring Tool Suite: http://www.springsource.com/products/sts, which is also an Eclipse, but much lighter (compare to RAD), faster and smarter “pluged-in”.

As far as testing. JUnit (http://www.junit.org/) should be aimed to cover two different separate layers of testing: Component/Unit Testing and Integration Testing. Component tests should be aimed to test exclusively content of the component with all of its dependencies mocked out ( http://mockito.org/ ). Where as Integration tests should test how well components integrate together, with all the test data staged ( in case DB is used: http://www.dbunit.org/ )

As for the test coverage, 85% to 90% is a good goal to aim for. Do not sign off, until this level of coverage is reached no matter how close your dead lines are, since if you do, that will increase amount of defects ten fold, that is just a law :)

If developers work on code that is / can be deployed to an Application Server, such as Tomcat, JBoss, Geronimo ( if you’re unlucky, Websphere :) ), consider getting JRebel ( http://www.zeroturnaround.com/jrebel/ ), it’ll boost developers productivity by.. let’s just say “a lot” :)

This is how I see it, and this really works for me, and projects around me.


28
Oct 09

Spring Insight in Action – 5 Minutes From Scratch

Spring Source Logo

Spring Insight gives deep visibility into your application’s real activity on a request-by-request basis. For any request you can see all the JDBC queries it made, how much time it took to render, or timings for any of your major Spring beans.” – said Jon Travis in his article on a Spring blog.

That is such a great idea I though, and watched Jon’s screencast.

What actually surprised me is how simple and quick it is to try the Spring Insight in action. Here are these 3 simple steps:

Step 1. Download Spring Tool Suite

I like to think about Spring Tool Suite as an Eclipse on Spring rocks (Spring IDE, Spring Interactive Tutorials, Exception Resolution, and much more). And now ( since version 2.2 ), it comes with tc Server Developer Edition that includes Spring Insight, so the easiest way to try out Spring Insight is to download Spring Tool Suite, since it comes with it: http://www.springsource.com/products/springsource-tool-suite-download

Note that “tc Development Edition” can be downloaded and run on its own, Spring Tool Suite (STS) gives us something extra: “ready to go” sample applications that we can deploy to tc Server – all in one.

Step 2. Import a sample web application

About those sample applications… Now as you have STS unpacked/unzipped, you can run it and go to “File” –> “Import” –> “Spring Tool Suite” –> “Sample Projects”. You should see three sample applications “Hotel Booking”, “PetClinic” and “SpringTravel”. I chose “PetClinic”, but it does not really matter, we can use any sample application to play with Spring Insight.

Once you click “Ok”, STS will ask you if that is ok to download 20+ MB of JARs, you, of course, having a huge HD, would say yes, and.. here you go 1 minute later you have yourself a fully functional ready to deploy web app!

Step 3. Deploy a web application to tc Server Developer Edition

Now right click on PetClinic app, -> Run on server -> Choose Spring tc Server (it is not going to say anything about Insight, but it’s there :) ).

At this point STS will ask you to browse to the location of your tc server, it should be under the directory you installed STS, e.g in my case it was: “/opt/springsource/tc-server-6.0.20.C”

After you click “Finish”, you should see “INFO: Deploying web application archive insight.war” as one of your deployment messages in STS console.

After another minute, once your app (PetClinic in my case) is deployed, go to http://localhost:8080/insight and you should be good to go:

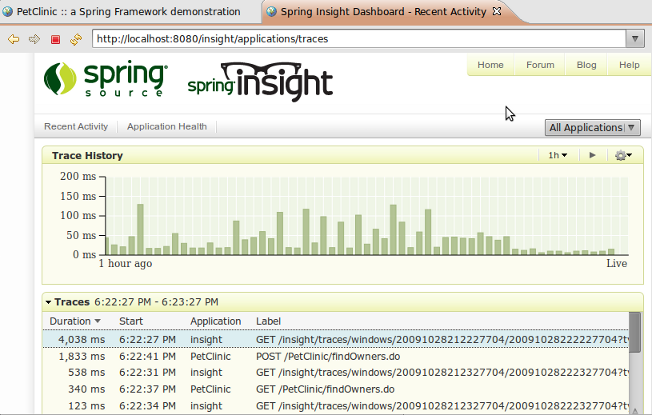
Spring Insight

Insight Away!


15
Sep 08

Reset Lost Password in Sun Application Server

Sun Application Server Password ResetHappens to the best of us, less with system admins more with developers. But we are all human, and believe it or not we DO forget and loose passwords at least once every so often. Some time ago I wrote a tutorial on how to reset lost root password in mysql, and here is another similar tutorial on how to reset the lost domain password but this time for Sun Application Server.

Before going any further with this article, please first check “.asadminprefs” file:

cat /home/toly/.asadminprefs
 
AS_ADMIN_USER=admin
AS_ADMIN_PASSWORD=YourSecretPasswordInTextHere!

the admin password could be there

If it is not there, there are two ways to reset it:

  • Reinstall or recreate the affected domain.
  • Create a new dummy domain and copy its security key file over to the real domain to substitute the password.

Below is an explanation for the second approach (in case when “reinstall or recreate affected domain” is not an option):

Given:

 >   Sun App server is installed in                 "/opt/SUNWappserver"
 >   Domain to which the password is lost:   "domain1"

Step 1. Creating a new dummy domain

/opt/SUNWappserver/bin/asadmin create-domain --adminport 7070 --adminuser admin --instanceport 7071 dummy-domain
 
Please enter the admin password>password
Please enter the admin password again>password
Please enter the master password>password
Please enter the master password again>password
 
Domain dummy-domain created.

Step 2. Copy dummy-domain’s “admin-keyfile” to domain1’s “admin-keyfile”

cp /opt/SUNWappserver/domains/dummy-domain/config/admin-keyfile  /opt/SUNWappserver/domains/domain1/config/admin-keyfile

now the password for domain1 is “password” – DONE :)

Step 3. Deleting the dummy domain

/opt/SUNWappserver/bin/asadmin delete-domain dummy-domain
Domain dummy-domain deleted.

NOTES:

The above is true for Sun’s Application Server 8.x and later.

For Sun’s Application Server 9.x check out “change-admin-password