"; */ ?>


10
Jan 11

Android Development: Best Practices

Cyanogen LogoI got introduced to an Android application development during Philly ETE conference by listening to “A guided tour of the Android ETE mobile application” talk, where Andrew Oswald ( a Java Architect from Chariot Solutions ) talked about creating an Android app for the conference, which was a cool introduction to “what it takes” to write one of those apps from scratch. I am looking forward to more talks around mobile development this year at Philly ETE conference as well.

Meanwhile I rely mostly on Android’s Developer Guide whenever I seek answers to my questions or/and best practices. Here are my notes on such practices I picked up listening to “A Beginner’s Guide to Android” Google I/O 2010 talk:

1. Avoid creating objects unless you really need to, try reusing Android’s API instead. Creating an object in a “desktop” world is relatively cheap, however in such a resource constraint environment as a mobile phone, it will drastically impact the performance.. not in a good way.

2. In order to avoid friendly “Force Close” popups from your applications, use Android’s “AsyncTask” which will allow to execute a certain activity in background:

 private class DownloadFilesTask extends AsyncTask<URL, Integer, Long> {
     protected Long doInBackground(URL... urls) {
         int count = urls.length;
         long totalSize = 0;
         for (int i = 0; i < count; i++) {
             totalSize += Downloader.downloadFile(urls[i]);
             publishProgress((int) ((i / (float) count) * 100));
         }
         return totalSize;
     }
 
     protected void onProgressUpdate(Integer... progress) {
         setProgressPercent(progress[0]);
     }
 
     protected void onPostExecute(Long result) {
         showDialog("Downloaded " + result + " bytes");
     }
 }

read more about AsyncTask in Android Developer Guide

3. Think about what an absolute minimum amount of updates / syncs you can do, and stick to this minimum. This will greatly improve battery life as well resource usage by the application.

4. Only use a WakeLock when you need one with as minimum level as possible: PARTIAL_WAKE_LOCK, SCREEN_DIM_WAKE_LOCK, FULL_WAKE_LOCK. Here is more about PowerManager

5. Respect a “Back” button: make sure it actually brings user back to a previous state rather than to another state of the application’s flow.

6. Always check whether “data transfer” is enabled on a device, before attempting to transfer data:

ConnectivityManager cm= ( ConnectivityManager ) getSystemService( Context.CONNECTIVITY_SERVICE );
boolean backgroundEnabled = cm.getBackgroundDataSetings();

this is especially important while roaming, when that “twitter update” can cost user a lot. So do respect user settings.

7. Don’t use undocumented ( not officially supported ) APIs => Next Android release your app is going to break.

8. Respect and use an application lifecycle:

void onCreate(Bundle savedInstanceState)
void onStart()
void onRestart()
void onResume()
void onPause()
void onStop()
void onDestroy()

read more about Android Application Lifecycle

9. Externalize resources: localization / optimized layouts / strings / array of strings / etc.. Android compiles them into a list of internal resources by assigning an integer ID to each of them, hence making it “cheaper” at runtime, and easier to change => since they are defined in a single location. Here is an example of auto generated ( random layout ) resources:

    public static final class layout {
        public static final int about_details=0x7f030000;
        public static final int all_upcoming_filtered_buttons=0x7f030001;
        public static final int details_text=0x7f030002;
        public static final int details_webview=0x7f030003;
        public static final int faq_details=0x7f030004;
        public static final int faq_details_row=0x7f030005;
        public static final int main_tabs=0x7f030006;
        public static final int map_details=0x7f030007;
 
        //.... the above is auto generated

10. Think of hiring or delegating UI to people who are designers. Beauty is important

11. Be resolution independent. Check out “layoutopt” and “hierarchyviewer” that come with Android SDK under “tools”. They help analyzing and optimizing layouts.

12. Consider using a “non sticky” services when appropriate:

@Override
public int onStartCommand( Intent intent, int flags, int startId ) {
 
     handleCommand( intent );
 
    // If this Service gets killed, don't restart it
    return START_NOT_STICKY;
}

this is useful for services that are going to be executed on a regular basis. So when you are pulling for updates every 10, 15 minutes, it is ok if one of such updates is missed in favor to a healthy resource management

13. Do not use foreground services unless you absolutely need to.

And if you do use foreground services, use an ongoing notification ( which, starting from Android 2.0, used automatically, if a service is started as a foreground one, but just to keep something in mind to be used for older OS versions )

14. Kill your own services via stopSelf():

@Override
prtoceted void onPostExecute( Void result ) {
    stopSelf();
}

15. Use Intents and Intent Filters to Leverage Other Apps

16. Prefer Alarms and Intent Receivers to Services

Now, with this in mind, go and Rock That Android Space!


10
Jan 11

Android: Prefer Alarms and Intent Receivers to Services

Cyanogen LogoContinue learning from “A Beginner’s Guide to Android” Google I/O 2010 talk, here is an example on how to use Intent Filter + Intent Receiver + Alarm to implement “schedule to execute every so often” functionality.

In Android, Alarms let you set an event to happen either in the future or on an ongoing basis in the future.

Let’s say we have a listener ( extends BroadcastReceiver ) that would execute a certain action ( MyService ):

public class MyReceiver extends BroadcastReceiver {
 
    @Override
    public void onReceive( Context context, Intent intent ) {
 
        Intent myIntent = new Intent( context, MyService.class );
        context.startService( myIntent );
    }
}

Now let’s connect/map this listener/receiver to a “REFRESH_THIS” Intent by creating an intent filter in a manifest file:

<receiver android:name="MyReceiver">
    <intent-filter>
        <action android:name="REFRESH_THIS"/>
    </intent-filter>
</receiver>

So whenever a system broadcasts a “REFRESH_THIS” intent, MyReceiver is going to spawn up and a “context.startService( myIntent )” is going to be executed.

Now in order to schedule “REFRESH_THIS” intent to be broadcasted, we would use an AlarmManager:

String alarm = Context.ALARM_SERVICE;
AlarmManager am = ( AlarmManager ) getSystemService( alarm );
 
Intent intent = new Intent( "REFRESH_THIS" );
PendingIntent pi = PendingIntent.getBroadcast( this, 0, intent, 0 );
 
int type = AlarmManager.ELAPSED_REALTIME_WAKEUP;
long interval = AlarmManager.INTERVAL_FIFTEEN_MINUTES;
long triggerTime = SystemClock.elapsedRealtime() + interval;
 
am.setRepeating( type, triggerTime, interval, pi );

The above Alarm will wake up a device every 15 minutes and execute MyReceiver’s onReceive() method. The cool thing is that even if your application is killed, this alarm will continue to run without your application running on the background consuming resources.

One thing to note..

Prefer Inexact Alarms …so OS can optimize when the alarm goes off

Why!?.. Let’s say there are 15 applications that set 15 alarms, which take a minute each to execute, and are all scheduled to be executed with a 15 minute interval => Potentially ( depending on the time they’ve been scheduled at ) they can end up executing every minute ( one after another ) resulting in Android device to be constantly on which is a dramatic impact at the resource usage.

“Inexact Alarms” would let OS “phase shift” these alarms to execute at the same time, rather than being arbitrary distributed depending on the time they were scheduled at. This allows OS to optimize and allocate resources in more intelligent fashion. So if you have something that needs to happen regularly, but does not need to happen at exact time, use “Inexact Alarms”.

In the above “alarm example”, in order to use Inexact Alarm change this line:

am.setRepeating( type, triggerTime, interval, pi );

to

am.setInexactRepeating( type, triggerTime, interval, pi );

Now the alarm will rely on the OS to optimize its execution time.


10
Jan 11

Android: Using Intents and Intent Filters to Leverage Other Apps

Cyanogen LogoUsing “Intent Filters” is a very powerful way to connect different applications together which allows greater reuse and makes a user experience transparent to the fact that more than one application is used to achieve a certain task.

Here is an example that is discussed in “A Beginner’s Guide to Android” Google I/O 2010 talk.

Let’s say there is an application that finds hotels and would like to use another application to book it. For that it creates an implicit “Intent” where it says: “hey android, I intent to book this hotel, please find an application that is capable of booking it, and pass the data to do the booking”:

String action = "com.hotelapp.ACTION_BOOK";
String hotel = "hotel://name/" + selectedHotelName;
Uri data = Uri.parse( hotel );
 
Intent bookingIntent = new Intent( action, data );
 
startActivityForResult( bookingIntent );

Now let’s say there is such a booking app installed on a device. Then, in its manifest, it will announce itself through the “intent-filter”, as an application capable to perform this action, e.g. “com.hotelapp.ACTION_BOOK”, to get the data from another app and book a hotel:

<activity android:name="Booking" android:label="Book">
    <intent-filter>
        <action android:name="com.hotelapp.ACTION_BOOK"/>
        <activity android:scheme="hotel"
                      android:host="name"/>
    </intent-filter>
</activity>

Within the “Activity” of a booking app, you can then “getIntent()” to find the one that was used, get the action along with the data and do the booking:

@Override
public void onCreate( Bundle savedInstanceState ) {
 
    super.onCreate( savedInstance );
    setContentView( r.layout.main );
 
    Intent intent = getIntent();
 
    String action = intent.getAction();
    Uri data = intent.getData();
 
    String hotelName = data.getPath();
 
    // Providing booking functionality
    // ... ...
 
    setResult( RESULT_OK, null );
    finish();
}

THE TAKE AWAY: Think about exposing functionality ( can be full of partial workflows ) of your apps in order for other developers / apps to use. At the same time check what is already exposed for you to leverage from other developers / apps.

P.S. Read more about Intents and Intent Filters


07
Jan 11

Tomboy on Mac

Tomboy On MacOn “from Ubuntu to Mac” journey I don’t leave my friends behind. Tomboy is such a friend. Plus I already have several hundreds on notes in Tomboy format, so the choice for a note taking app is very obvious here.

To install Tomboy on Mac there are only two things that need to be done:

1. Download Tomboy ( Mac App ): http://projects.gnome.org/tomboy/download.html ( unzip, copy to /Applications )

2. Install “Mono” framework (a .NET framework for *nix systems): http://www.go-mono.com/mono-downloads/download.html

To migrate existing notes ( e.g. *.note ), I had to do a 30 seconds digging. It appears that unlike on Linux, where notes live under “~/.tomboy”, on Mac notes live under:

~/Library/Application Support/Tomboy/

So that is the place to copy all the existing notes to. Once copied, Tomboy is all good to go.

Welcome to my new OS X world Mr. Tomboy!


07
Jan 11

Starting with Scalate

scalateScalate: Scala Template Engine: like JSP without the crap but with added Scala coolness

Here is a one minute way to start playing with Scalate: 30 seconds to finish reading this + 15 seconds to calm inner excitement + 15 seconds to actually do it. Get ready.. it is that simple.

( Step 1 is OS X based, check these install instructions in case your OS is different ):

Step 1. Install Scalate ( makes sense to install Scala as well, if you don’t have it )

sudo brew install scala
sudo brew install scalate

Step 2. Create a Scalate project

scalate create guice org.dotkam scalatez

where “org.dotkam” is a user defined groupId and “scalatez” is a user defined artifactId [ hellllo maven ]

NOTE: "scalate create jersey org.dotkam scalatez" may give you "Invalid syntax: No such archetype 'jersey' possible values are (empty, guice)" depending on the current Scalate version. Don't be distressed: use 'guice' as shown above

Step 3. Run it

cd scalatez/
mvn jetty:run

Once you see

2011-01-07 14:28:42.597:INFO::Started SelectChannelConnector@0.0.0.0:8080
[INFO] Started Jetty Server

Fire up the browser and go to “http://localhost:8080

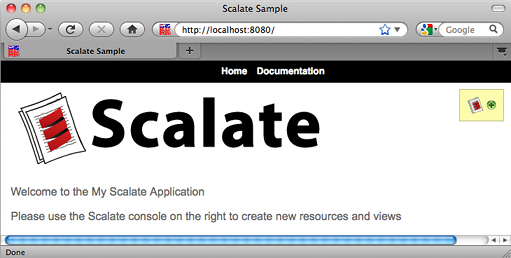
Scalate Default Home Resource

DONE.

At this point you are good to start working with the Scalate project.
Let’s modify the current home page that you see in your browser:

vi src/main/webapp/WEB-INF/org/dotkam/scalatez/resources/HomeResource.index.scaml

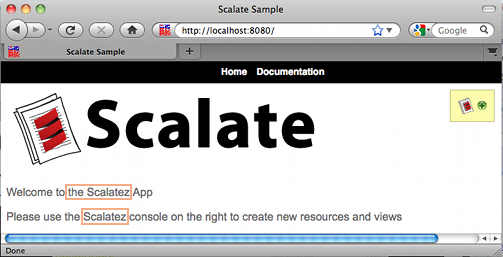
once you save it, no need to restart: Jetty would pick you changes immediately ( e.g. “scanIntervalSeconds” parameter ), so just refresh that browser:

Scalate Custom Home Resource