"; */ ?>


07
Jan 09

Install Adobe Flash Player Firefox Plugin

Flash Player on Ubuntu

Since I upgraded one box to Ubuntu 8.04 (Hardy Heron), and another box to Ubuntu 8.10 (Intrepid Ibex), it was quite irritating for some time to watch youtube videos with no or flaky sound along with skipping videos.

In Firefox, when I went to “Tools -> Add-ons -> Plugins”, or just typed “about:plugins” in the address bar, I saw that I do have “Shockwave Flash 9.0 r124”, however it just dis not want to work smoothly. The same was true for “”Shockwave Flash 9.0 r100”.

So you would think that the right thing to do was to go to the Adobe website: “http://get.adobe.com/flashplayer/“, choose “get the one for Ubuntu 8.04+” option, and download the latest (v10 / v11 / v12 / v13 / v14 / whatever…) flash player, right? Well, not really. After I did that, I saw both “Shockwave Flash 9.0 r124” and “Shockwave Flash 10.0 r15”, so I disabled 9.0 one, and enabled 10.0 – should be good right? NOPE.

What appeared to be the solution for this mess of flash plugins was to do some “sudo apt-cache search flash…” searches, and figure out what needed to go from both systems.

There were two culprits that overruled the only enabled “Shockwave Flash 10.0 vr15” plugin: “swfdec-mozilla” and “mozilla-plugin-gnash”. And hence they are going to be removed with all other potential inconsistencies:

sudo apt-get remove -y --purge flashplugin-nonfree gnash gnash-common mozilla-plugin-gnash swfdec-mozilla libflashsupport nspluginwrapper
sudo rm -f /usr/lib/mozilla/plugins/*flash*
sudo rm -f ~/.mozilla/plugins/*flash*
sudo rm -f /usr/lib/firefox/plugins/*flash*
sudo rm -f /usr/lib/firefox-addons/plugins/*flash*
sudo rm -rfd /usr/lib/nspluginwrapper

After this, I had a good feeling and went to http://get.adobe.com/flashplayer/ again, chose “get the one for Ubuntu 8.04+”, saved “install_flash_player_version_linux.deb” locally, and install it with my bare hands:

sudo dpkg -i install_flash_player_10_linux.deb

Restarted Firefox, and let me tell you – Quality of my Ubuntu life has improved significantly since then!
Want to improve the quality of your life significantly? Follow the two steps above :)


06
Jan 09

Find USB flash drive device in Linux

Find USB drive in Linux / Unix

Recently I have written a quick “how to” on restoring, formatting a USB flash drive. The “how to” had a lot of hits from different places since then, mostly from GOOGLE, of course, but some from independent bloggers, like my blogging self.

One of such places was www.newlinuxuser.com. Although the guide “saved them” (welcome :)) they had a very constructive critique that one thing the guide missed was how to actually find which device to restore / format.

Hence I decided to write a new little 2 step “how to” that will teach you just that.

Step 1. System Log is your friend, listen to what it has to say…

Imagine you close your eyes, and someone puts an apple in your mouth – would you be able to identify what the heck was put into your mouth? For most people the answer would be “yes”. ( If you’d like to experiment, feel free :). The thing is once you bite on that apple, your brain goes through many lines of code (given that we are written in C), finds that match, and reports:

"The object in your mouth was identified as an Apple - we've had that before.
  I just talked to the stomach, it knows how to digest it."

You would think that your Linux/Unix system is any different? Well, not really.

Right after you insert a USB device into a slot, Linux/Unix will try to read, and identify it. While doing that, it will also assign it to a particular device as “/dev/particular-device”. This device is exactly the information we need, so we can talk to it, and mount it.

Although most people would approach it with running a dmesg, and look at the output, I prefer a more natural OS way to look at things – we’ll look directly in the eye of a System Log!

Let’s use “tail -f”, so we can see real time system log updates:

tail -f /var/log/messages

Now insert your USB drive into a slot and you should see the output similar to:

Dec  5 14:53:19 your-hostname kernel: [81585.308993] usb 4-1: new full speed USB device using uhci_hcd and address 3
Dec  5 14:53:19 your-hostname kernel: [81585.456757] usb 4-1: not running at top speed; connect to a high speed hub
Dec  5 14:53:19 your-hostname kernel: [81585.484884] usb 4-1: configuration #1 chosen from 1 choice
Dec  5 14:53:19 your-hostname kernel: [81585.498817] scsi6 : SCSI emulation for USB Mass Storage devices
Dec  5 14:53:24 your-hostname kernel: [81590.514870] scsi 6:0:0:0: Direct-Access     USB 2.0  USB Flash Drive  0.00 PQ: 0 ANSI: 2
Dec  5 14:53:24 your-hostname kernel: [81590.519874] sd 6:0:0:0: [sdb] 15794175 512-byte hardware sectors (8087 MB)
Dec  5 14:53:24 your-hostname kernel: [81590.522834] sd 6:0:0:0: [sdb] Write Protect is off
Dec  5 14:53:24 your-hostname kernel: [81590.534817] sd 6:0:0:0: [sdb] 15794175 512-byte hardware sectors (8087 MB)
Dec  5 14:53:24 your-hostname kernel: [81590.537814] sd 6:0:0:0: [sdb] Write Protect is off
 
>>>>  Dec  5 14:53:25 your-hostname kernel: [81590.537888]  sdb: sdb1  <---- GOT YOU!
 
Dec  5 14:53:25 your-hostname kernel: [81590.654848] sd 6:0:0:0: [sdb] Attached SCSI removable disk

Note that the USB drive was “connected”, or associated with sdb device

[81590.654848] sd 6:0:0:0: [sdb] 15794175 512-byte hardware sectors (8087 MB)

and more precisely, with sdb1 device

[81590.537888]  sdb: sdb1

And that means we can talk to it! The full name of the guy would be “/dev/sdb1”.

Now let’s greet our friend. Say: “Hi /dev/sdb1”! :)

Step 2. Mount USB drive’s device to the File System.

Just an extra step, in case you need to mount it. If you can’t, and would like to format it, so you can mount it afterwards, read this.

To mount the drive enter this:

sudo mount -t vfat /dev/sdb1 /media/usbdrive/

where “/dev/sdb1” is the name of the device, we found in the step above. “/media/usbdrive/” is the directory that we are going to mount it to. Make sure this directory exists (otherwise create it “sudo mkdir /media/usbdrive/”). And “-t vfat” is asking your Linux/Unix OS to mount this device as a “vfat” (FAT16, FAT32) device.

Many, if not most, USB devices are VFAT, however if you have an NTFS USB hard drive, for example, you can mount it by entering:

sudo mount -t ntfs-3g /dev/sdb1 /media/usbdrive/ -o force

“sudo” in above couple commands comes from mostly Ubuntu way to “run command as a super user”. If you have any other flavor of Linux/Unix, you may want to just run it as a “root” user.

Eat more apples, and good luck!


19
Nov 08

ZX-Spectrum Child

zx speccy logoMy first computer book was “Basic for Children with Arturo”. It was 1989, the book was in Russian, and I was 10…

Back then, in USSR, to own a 8086 compatible PC was somewhat mystical, and therefore people, who knew a thing or two about microelectronics, were putting together Speccy(s) (ZX Spectrums), which were based on Zilog Z80 8-bit microprocessor and ran at 3.5 MHz.

The official ZX-Spectrum that was sold by “Sinclair Research Ltd” at that time was a bit pricey for middle class families, and therefore many cities across Europe and USSR started to come up with their own “clones“. There were over 50(!) semi-official clones that came out by the end of 1980s, beginning of 1990s. But to cut cost even further, people who knew “how to solder” created hybrids of the clones at home, which came out to be very cheap.

The process to build ZX-Spectrum’s clone’s hybrid was “a bit” involved, and included many days/weeks of hacking poor, incomplete electrical circuit documentation and sleepless nights of manual calibration of the hardware. The one had to “get” a ZX-Spectrum full circuit schema:
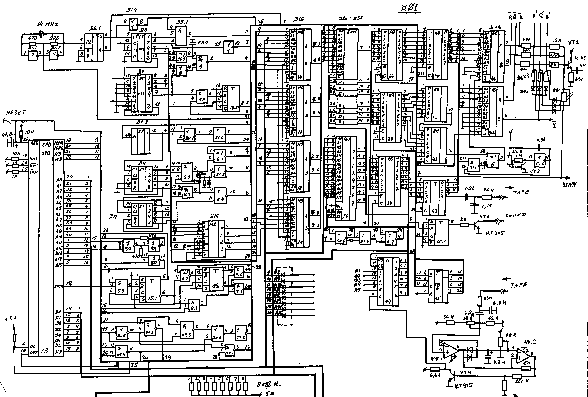
zx spectrum electrical circuit

Study it, change it to fit the budget. Go to several flea markets to first find a CPU, which was a quite rare find:
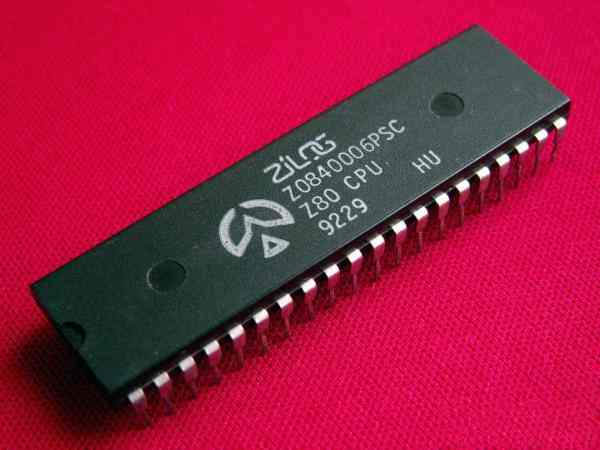
zilog z80 cpu

plus many more components: an empty electrical board, all other chip, transistors, capacitors, resistors, etc…

After some time and a combination of new ideas, documentation, hardware and labour, the one ended up with something like this:
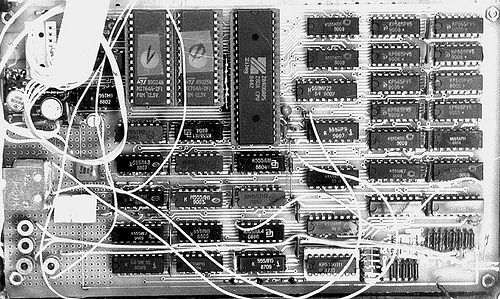
zx-spectrum circut board

ZX-Spectrum keyboard had an interesting feature – pretty much every key, depending on the combination of special keys used, could represent 3-4, sometimes even 5 different things (commands/letters/symbols/special characters/etc). This made it much smaller (“compacter”) than for example PC keyboards:
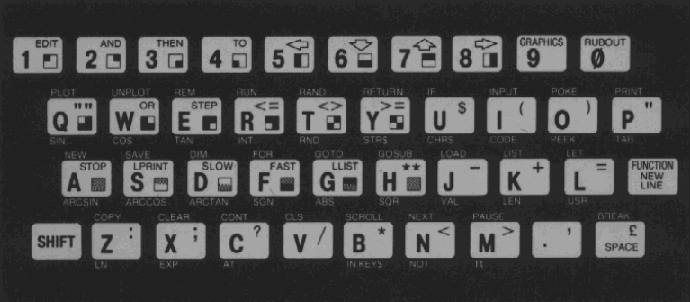
zx-spectrum keyboard

And due to its small size, it most of the time served as a ZX-Spectrum case, and fit it the Speccy’s “motherboard”:
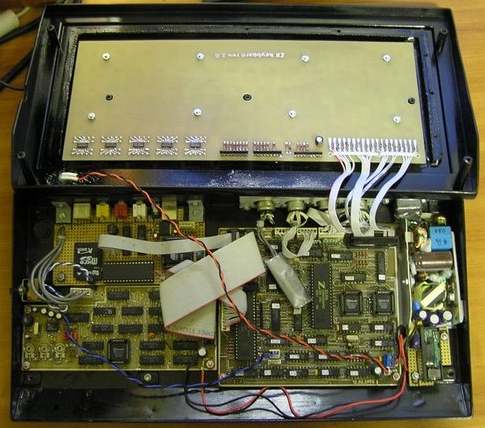
zx-spectrum under the keyboard

There were also some alternatives, and some people used “an extended” keyboards, but “a single key multi-purpose” pattern was still there. Here is a snippet of the Russian ZX-Spectrum keyboard, for example:
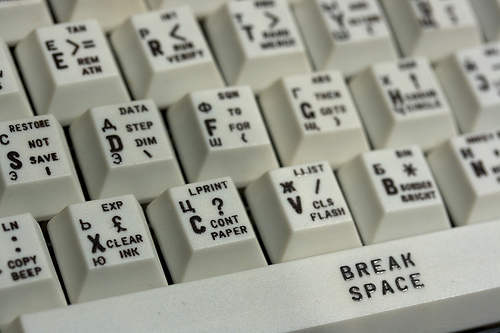
zx-spectrum russian keyboard

which is “a bit extended” – has a separate cursor, and some other keys. But take a look at the individual keys – due to the additional Cyrillic letters, “an average key” is now used to represent even more (+1) values.

At this point, when most of the work with oscillograph was behind, the only true way to see if the creation works was to see it with your own eyes. The word “monitor” in a sense of a “computer monitor” was not a widely used due to its price mostly, therefore most of ZX-Spectrum people used old black and white (at first) TVs. Speccy (well it’s clone’s hybrid at least) was designed in a way that it could be pugged into a regular TV Antena’s jack:
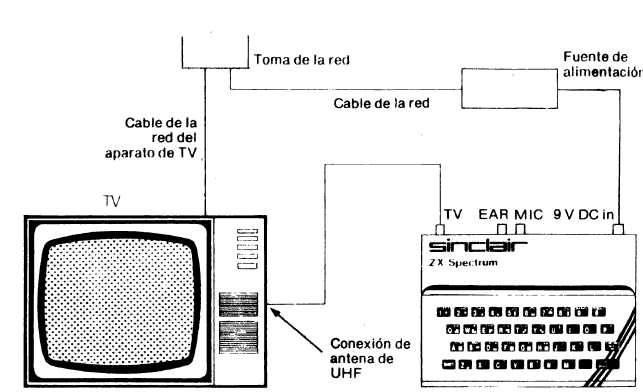
zx-spectrum hookup to TV

And due to the fact that family is usually more than one person, the main TV often was not used, and people used old TVs as a Speccy “monitor” instead:
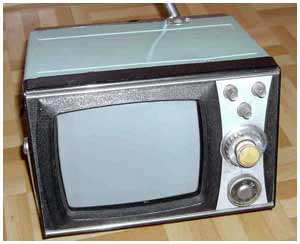
zx-spectrum TV monitor

The whole process above was about 50% of the job – yea, just 50%. The other half was split on two. First quarter was spent in calibrating hundreds of little circuits, in order to get a sacred “© 1982 Sinclair Research Ltd” message at the bottom of TV (monitor):
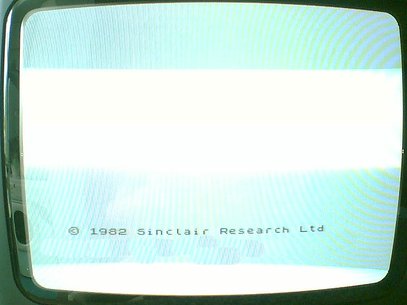
1982 Sinclair Research Ltd

This message brought lots and lots of joy into families once it appeared on the screen. It meant a lot – CPU was working (so that guy on the flea market who sold it to you was ok.. sigh…). ROM was working (so that guy on the flea mark…). CPU and ROM were calibrated to work together, along with RAM and some other parts.

Usually the one plugged in Speccy to TV with no RAM/ROM/CPU at first, and calibrated all the circuits to reach a documented pattern on TV (for example small squares). After that was achieved, RAM/ROM and CPU were inserted one after the other by the same technique – each had to produce a certain visual pattern. So if all the parts were inserted and the message “© 1982 Sinclair Research Ltd” appeared, job was 75% done.

The last quarter was usually spent to tune all the parts to work as designed. Most of the time Speccy would restart in 3-4 minutes of use, just because something was “out of it”. To find that “something” was an art on its own. There was no Internet, no books or literature on this – it was pure work of art!

Fortunately my father is such an artist, and by the time I was 10, I got one of those Speccy beasts that my dad and I put together. The only problem though was that although it was designed to have 64Kb of RAM, it only had 16Kb. Well, 7 months later we solder more capacitors around 4Kb RAM memory chips, and that fixed it, but for 7 months I could not really play any games, because most of them required 64Kb to be there. Hence, the “Basic for Children with Arturo” book did not get a chance to get too dusty…

Where ZX-Spectrum shined the most is of course boot time – there was none :) Well, everything was in a ROM chip, including Sinclair Basic.

So having spent about 4-5 months to build Speccy, I was out of luck, and could not use it. Well, that is how I saw it for the first one or two weeks. But then…. I pressed a “p” key, which by default was a Basic “print” command, and then…. I typed what was on my mind: “I want to play!”, and to my astonishment Speccy “said“: “I want to play!”.

It is probably hard to surprise anybody right now by the fact that computer prints something on the screen, when you ask him/her to, but for me, being 10, and haven’t seen anything cooler than that, it was the biggest technical discovery of all times. I picked up my Basic book, and started to type, and type, and type, and then…. type a little more. That is how I started. That, in programming sense, makes me a “Speccy Child”.

A program in Basic in Speccy looked something like this:
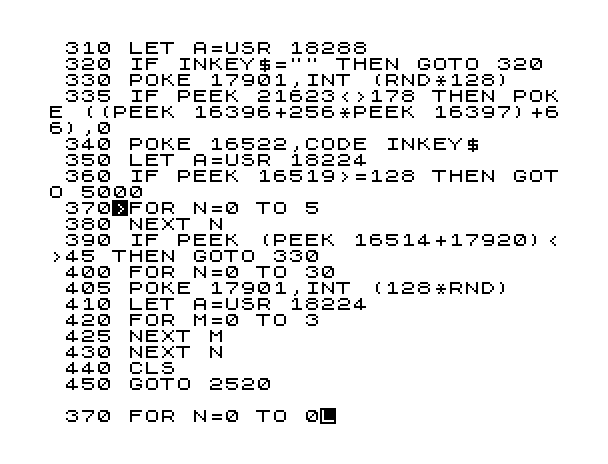
zx-spectrum Sinclair Basic

where every line had to have a number, and the usual increment was 10. Quickly my favourite commands became “peek”, “poke” and “randomize” which worked directly with the memory (absolute addresses). And although I felt like a memory King, something was missing. I figured out what it was after I bought a system program that exposed me to something much more powerful than Basic – it was 8-bit Assembly language, the language that Zilog Z80 talked natively. Therefore me together with Z80, could control pretty much everything in the Speccy kingdom. That was awesome!

Here is an example on how you’d print a line of text to the screen in Speccy’s native language:
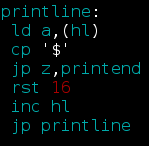
zx-spectrum z80 assembly

Cool – huh!? Another thing that was very useful at the beginning of my Assembly journey, was a documented character table ( like an “ASCII” ):
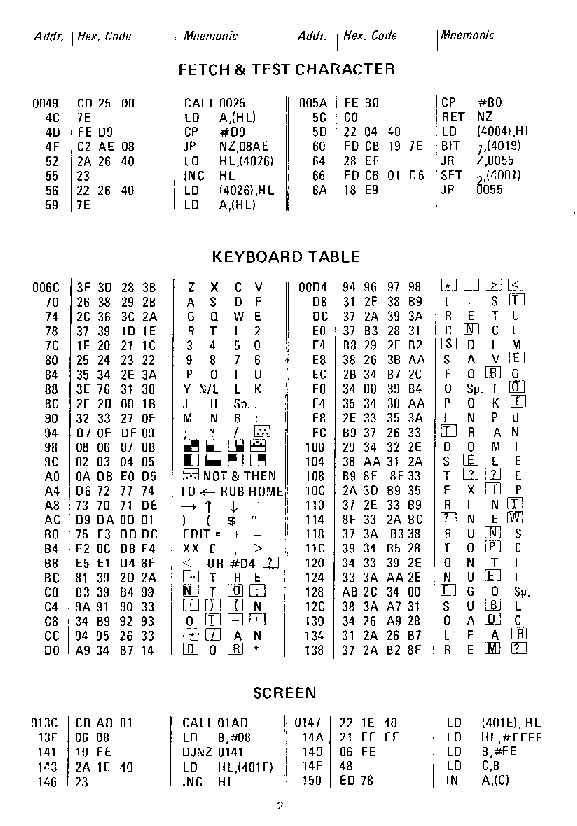
zx-spectrum ascii table

The only problem was that in order to work in Assembly, or in any other language, or with any other system program – it needed to be loaded since it was not in RAM/ROM – and that took time. No, really took time. It needed to be loaded from a tape – a regular cassette that is used in a tape recorder. In fact these very tape recorders were used to load all these neat programs in:
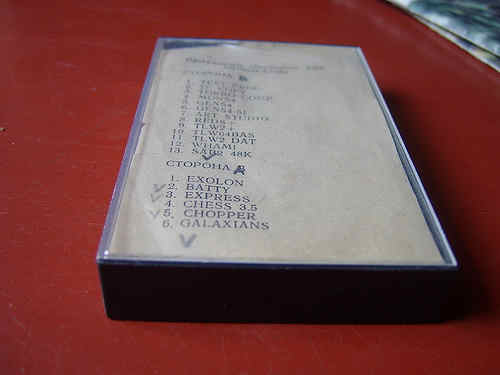
zx-spectrum tape

But not only it did take time to load, it was a constant pain to tune the head of the tape recorder for each tape bought on the flea market, since nobody followed the recording standards. A lot of times, you would have to sit and hold a screwdriver against the recorder’s head for 3-5, even 10 minutes, depending on how big the program was.

Here is what the screen looked like when the program was loading from tape into RAM. You can see the zebra looking lines, they were the moving loading indicator:
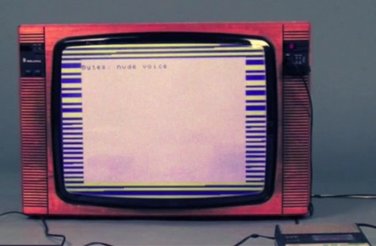
zx-spectrum loading screen

But time went, flea markets grew along with demand, and we upgraded to the real “RGB deal”. It was done by soldering an external controller (kind of like modern video cards, but not really) that had an RGB jack:

zx-spectrum rgb jack

Although it had 9 pins, only 5 were used: Red / Green / Blue / Sync / Ground. But we did not stop on this. Soldered another external controller, but this time for a disk drive! Oh yea – that was a huuuge deal. Looking at programs to load for seconds (well in rear occasions minutes) from these beautiful 5 inch disks!

Since we had a disk drive, Speccy needed to catch up with us, and the disk controller brought another cool thing, which was TR-DOS, where, of course, DOS stands for Disk Operating System. That is how pretty it looked:
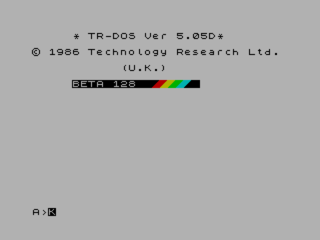
zx-spectrum tr-dos os

Did you notice some colour? Good catch :) So now it was possible to actually browse the disk, and start programs with a button click. There were tons of system utilities with different browsers that you could start at the start up time (sort of like in MBS, but not).

Right after TR-DOS, I felt like I need more. I need more.. I need more.. RAM! And we soldered another level of RAM on top of 64Kb chips. So now my Speccy was equipped with 128Kb of RAM, which could free up some ROM real estate, which enabled ROM to fit a little menu on startup:
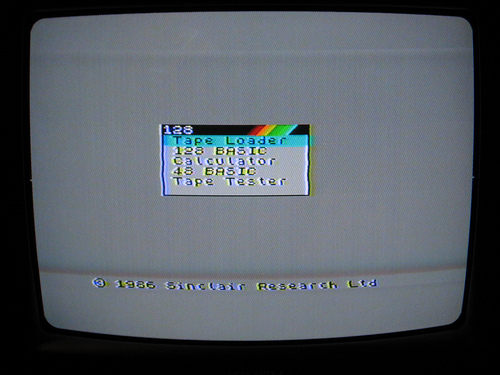
zx-spectrum 128 menu

At this point not only I could swim in the Assembly language ocean, but also play games, and use various utilities!

First let’s look at Photoshop:
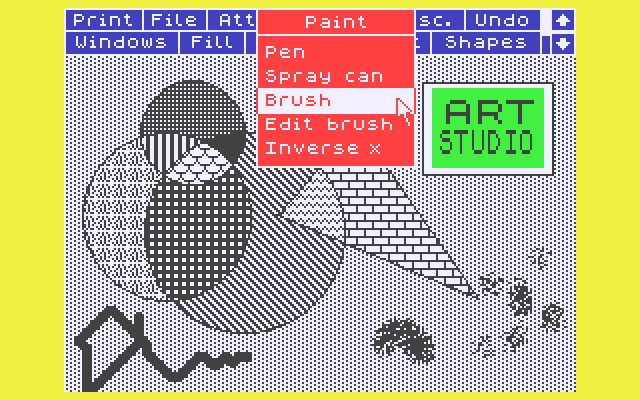
zx-spectrum artstudio

well, maybe not the Photoshop you’re used to see right now, but Art Studio rocked! I was drawing away for hours!

Now, how about CuBase/ProTools:
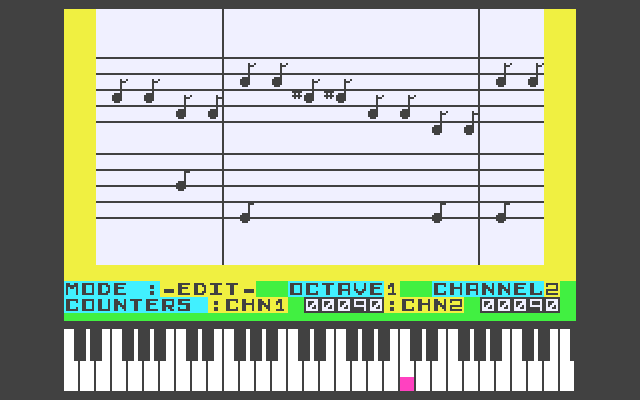
zx-spectrum wham the music box

well, maybe not exactly the latest CuBase, but I wrote lots of tunes in Wham. Some tunes I actually recorded along with playing a real guitar – it was cool!

As to games, my favourite control was my keyboard, but for many friends that came to play, I bought a joystick:
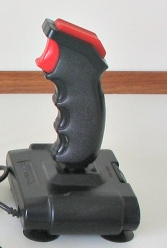
zx-spectrum joystick

Now we could play multiplayer games like:
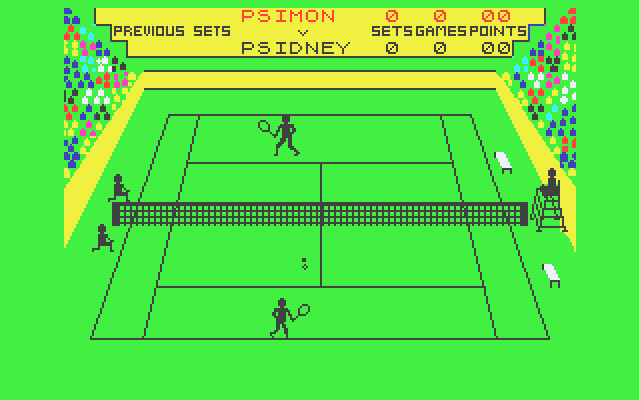
zx-spectrum match point game

Match Point (Tennis) or:

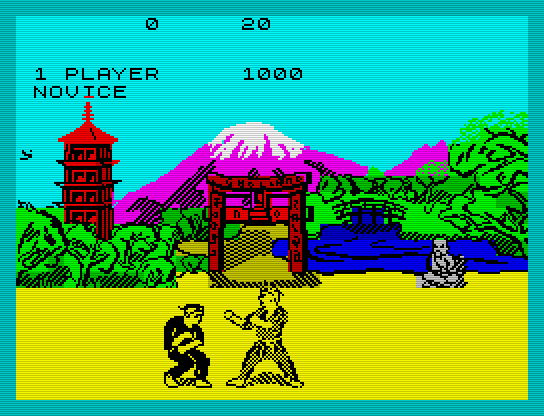
zx-spectrum fist game

Fist (Karate) game. Or even:

zx-spectrum tetris2 game

Tetris2 – which was a bit different from the regular Tetris in a way it gave different patterns and challenges on different levels, and was also a multiplayer game, which was of course cool.

There were tons of other games, but two I still remember are Robocop:
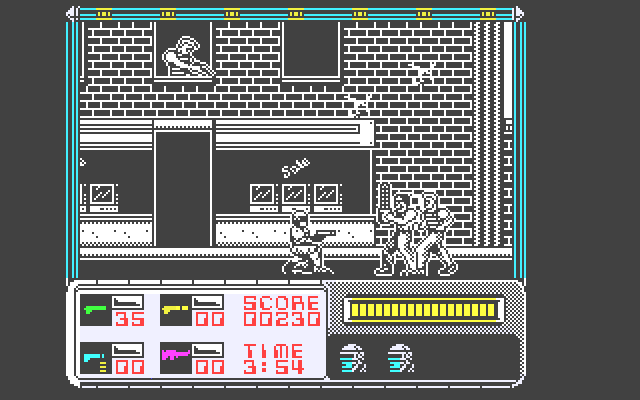
zx-spectrum robocop game

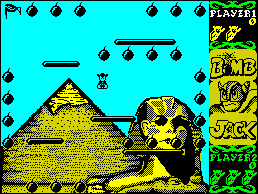
and Bomb Jack:

zx-spectrum bomb jack game

I could play long long time in Bomb Jack, not longer than I spent writing my own little games in Assembly language of course, but still – it was good amount of Bomb Jack time.

All the above was of course some time ago… 25, or even soon 30 years. Everything is a bit different now. Speccy lives somewhere in museum behind the glass:
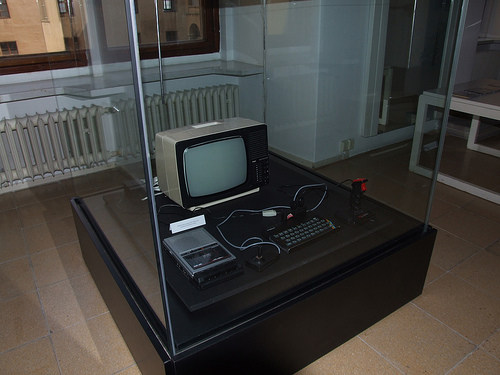
zx-spectrum in museum behind the glass

But I remember him/her – those were times of big discoveries for me!

Like probably right now for some other 10 year old kid who just accidentally pressed a “p” button, and discovered….. time traveling…

Good luck to you kid!


17
Nov 08

Configure iwl3945 Driver on Ubuntu

It is quite frustrating when you have a wireless card built in, but you cannot use it – don’t you agree? That seems to be the case for wifi cards that are served by “iwl3945” driver. One of such examples can be “Intel Corporation PRO/Wireless 3945ABG” card.

Before, ( e.g. Feisty and earlier ) “ipw3945” driver was used instead, and worked beautifully with Intel cards. However the active development of this driver has stopped a couple of years ago, which means that security risks that were identified in the last couple of years were not patched. Therefore Ubuntu community switched to a more recent and supported “iwl3945” driver.

However that created a problem with NetworkManager that is used as a default network user interface in (Gnome) Ubuntu. It appears that in order “to be compatible with NetworkManager, a wireless driver must support both hardware and software scanning. Currently, hardware scanning is faster and more reliable and so is recommended for use with NetworkManager“. But unfortunately “iwl3945” driver does not support hardware scanning very well, however it is a default behaviour that NetworkManager expects.

But usually, and that is what I love Ubuntu for, if there is a problem, there is 99.9999% a solution to this problem. So this how to will help you solve it, and enjoy your Intel Wireless card with Ubuntu, despite of inconsiderate (in this case) NetworkManager.

1. Remove the bad guy

sudo apt-get remove network-manager

2. Disable “iwl3945” hardware scan

sudo vi /etc/modrobe.d/iwl3945

enter:

	alias wlan0 iwl3945
	options iwl3945 disable_hw_scan=1   # <-- enables software scanning

and save it (:wq).

At this you might want to restart or (optinal) just re-insert the module like this:

sudo modprobe -r iwl3945
sudo modprobe iwl3945

3. Install the good guy

Here you’ll install “the good guy” – his/her name is WICD:

Add wicd’s repository to Ubuntu sources:

sudo vi /etc/apt/sources.list
	 deb http://apt.wicd.net intrepid extras

(if you have Hardy Heron, then add “deb http://apt.wicd.net hardy extras” instead)

Update repositories

   sudo apt-get update

Install wicd “the normal Ubuntu way”:

   sudo apt-get install wicd

4. Run the good guy

   wicd-client

or restart, it should run automatically.

Happy wifying!


10
Nov 08

Configure Simp Server to Encrypt IM clients in Linux

Recently many companies started to inject their security policies with securing IM communication. It makes sense, since everything you type in that chat window to your buddy flies over the network in a clear text. That does not sound to bad, you think, but what it really means, is if anybody wanted to see what you are talking to your colleague, or even to your wife, about, s/he can see it easily by reading your network packets – which is a very easy thing to do now days.

Another example could be the client whose policy is to monitor all the incoming/outgoing network request, and you want to talk over IM to your colleague about something that you do not want your client to see.

Below I’ll show you how to secure you IM communication with SimpServer: http://www.secway.fr/us/products/simpserver/ on Unix client/server boxes. I am going to use Ubuntu here as an example, but it should work for most if not for all Unix flavours.

1. Get the SimpServer.

According to the liink above “SimpServer is currently beta software and is free for any use”, hence let’s get it for free from here:

wget http://download.secway.com/public/products/simpserver/simpserver-2.1.5c-linux-x86.tgz

2. Install the SimpServer.

Before untarring it, let’s make sure the standard C++ libraries that SimpServer uses are installed:

sudo apt-get install libstdc++5

Now let’s untar it and move to “/usr/local” – that is where it will search for its binary files, so make sure you do that:

tar -xvzf simpserver-2.1.5c-linux-x86.tgz
 
sudo mv simp/ /usr/local/

Go to “/usr/local/simp/bin/”, and run the SimpServer:

cd /usr/local/simp/bin/
 
./simpserver
 
----------------------------------------------------------------------------------
SimpServer Linux 2.2.1.5c - (c) Copyright Secway 2000-2005
All rights reserved
 
Visit http://www.secway.com/products/simpserver/ for updates.
Visit http://www.secway.com/support/ for support.
 
MSN Service on 0.0.0.0:11863, mode 1
MSN Service on 0.0.0.0:1863, mode 0
AIM Service on 0.0.0.0:15191, mode 1
ICQ Service on 0.0.0.0:15190, mode 1
YAHOO Service on 0.0.0.0:15050, mode 1
Admin Service on 127.0.0.1:10023, mode 0
 
----------------------------------------------------------------------------------

If there are any problems, grab the simpserver version that is offered here: http://www.secway.fr/us/products/simpserver/download.php

3. Configure the SimpServer.

While SimpServer is running, telnet to it (port 10023). Default “username/password” are “admin/admin”:

$ telnet localhost 10023
Trying 127.0.0.1...
Connected to localhost.
Escape character is '^]'.
SimpServer Linux 2.2.1.5c - (c) Copyright Secway 2000-2005
All rights reserved
 
Visit http://www.secway.com/products/simpserver/ for updates.
Visit http://www.secway.com/support/ for support.
 
Login: admin
Password: admin

Let’s see what it is capable of by asking for “help”:

> help
SimpServer Linux 2.2.1.5c - (c) Copyright Secway 2000-2005
All rights reserved
 
Visit http://www.secway.com/products/simpserver/ for updates.
Visit http://www.secway.com/support/ for support.
 
 ?,        help                  print this help
 list,     list_keys             [all, public, private]
 generate, generate_private_key  [-e<account>] [-s<service>] [-c<cipher>] [-b<size>] [-n<name>] [-p
<password>]
 load,     load_private_key      -i<keyid> [-e<account>] [-s<service>] [-c<cipher>] [-p
<password>]
 unload,   unload_private_key    -i<keyid> [-e<account>] [-s<service>] [-c<cipher>]
 change,   change_password       -i<keyid> [-e<account>] [-s<service>] [-c<cipher>] [-o
<old_password>] [-p<new_password>]
 delete,   delete_key            -i<keyid> [-e<account>] [-s<service>] [-c<cipher>] [-force] [-pendinf]
 accept,   accept_pending_key    -i<keyid> [-e<account>] [-s<service>] [-c<cipher>]
 quit,     exit                  exit

4. Create private/public certificates.

Notice that the “list” command, from the above help, shows all/public/private keys, including your public/private key, and all your IM buddies that you are talking to.

Let’s try to see what keys we have right away (without doing anything yet):

> list
Prv  Loaded KeyId             SHA-1 fingerprint                                   Date        Type         Srv  Name
--------------------------------------------------------------------------------------------------------------------

As you can see, we have no keys – because for now we have neither “secure/encrypted” IM buddies, nor our public/private key pair.

Hence start by by running a “generate” command that would create your the key pair (link to certificates article) that will be used:

> generate
generating the new key pair, please wait... done!
new key: 278dc025d92cdbc4  b14e 7b16 6415 e88f 2a67 2fe6 2e31 579b 580e 1a89   2008-10-16  RSA-2048  [admin] KeyPair

Now let’s “list” the keys again:

> list
Prv  Loaded KeyId             SHA-1 fingerprint                                   Date        Type         Srv  Name
--------------------------------------------------------------------------------------------------------------------
Yes  Yes    278dc025d92cdbc4  b14e 7b16 6415 e88f 2a67 2fe6 2e31 579b 580e 1a89   2008-10-16     RSA-2048    *  [admin] KeyPair

Perfect – you have your own “KeyPair”, that will be used to authenticate and encrypt communication from your IM buddies.

5. Connect IM clients to the SimpServer.

Next, let’s connect to our SimpPro / SimpLight / etc.. IM buddies. Here is an example on how to configure “Pidgin” to use a SimpServer:

For example you’d like your work AIM account to “follow the company standards” and use encryption via simp server. Here is what you should do

Go to "Accounts" -> (Choose your AIM account) "Edit Account" -> "Advanced"
 
Choose "SOCKS4" in "Proxy Options"
 
type "127.0.0.1" in Host
type "15191" in Port

Pidgin SOCKS4 settings

Why “127.0.0.1”? Because you have started the SimpServer on your local box. By the way, you can start the server on one box, and use it from many other PCs by entering IP address of that box to the “host” field for the proxy settings of the account in your IM client.

Why “15191”? Let’s look at the server output once again:

MSN Service on 0.0.0.0:11863, mode 1
MSN Service on 0.0.0.0:1863, mode 0
AIM Service on 0.0.0.0:15191, mode 1
ICQ Service on 0.0.0.0:15190, mode 1
YAHOO Service on 0.0.0.0:15050, mode 1
Admin Service on 127.0.0.1:10023, mode 0

We see that “AIM Service” listens on the port “15191”.

6. Start using the SimpServer with your IM client(s).

Now when you send an IM to anybody who runs SimpPro / SimpLight / or just a Simp Server, they would get a pop up asking them to accept your message. After they do accept it, your public key ( one of the keys that was generated by the “generate” command ) will be added to their Simp database. Same thing will happen when they ping you or respond to your IM encrypted message – their public key will be added to the simpserver:

Here is an example of what happens initially, when there is a new “Simp-Oriented” buddy pings you:

(2008-10-16 15:16:09) BuddyName: *** (*) SimpServer Linux 2.2.1.5c - Encrypted and Authenticated (*) ***
(2008-10-16 15:16:09) BuddyName: Hey, that is cool - so now our messages are encrypted...!

And now you can go back to your “telnet” session and “list” the keys again:

> list
Prv  Loaded KeyId             SHA-1 fingerprint                                   Date        Type         Srv  Name
--------------------------------------------------------------------------------------------------------------------
Yes  Yes    278dc025d92cdbc4  b14e 7b16 6415 e88f 2a67 2fe6 2e31 579b 580e 1a89   2008-10-16     RSA-2048    *  [admin] KeyPair
 No  N/A    0f2292a9d40c2f90  ab1d 6f78 6bff a03e 892a 34df 2b3a 26e7 16ff cbb9   2008-10-16     RSA-2048  AIM   <buddy1Name>
 No  N/A    62f02d7e858e0139  c315 616f 8518 d9c8 9827 e4c4 d8b4 2448 06f7 4278   2008-10-16     RSA-2048  AIM   <buddy2Name>

Notice that now you have your own “KeyPair”, a public key for “Buddy1Name”, and a public key for “Buddy2Name”.

Happy Secure IMing, and don’t abuse your secrecy :)